Assembly of the device
Installation of the sensor rod of the pickup sensor
Installation of the sensor rod is done according to the procedures described below.
-
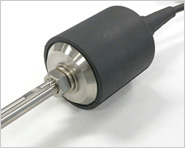
(1) Install an "M8 nut," an "M8 spring water," and an "M8 flat washer" onto the threaded part of the sensor rod in the order indicated.
The nut should be tightened lightly to the inner part of the threaded part of the sensor rod.
-
(2) Insert the thread of the sensor rod into the screw hole of the acceleration sensor, and tighten the thread by hand to the inside.
At this time, avoid tightening the thread too tightly by using a spanner.
Note that when removing the sensor rod, if it cannot be turned by hand, remove it by using the 7 mm spanner included as an accessory.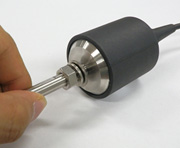
-
(3) Tighten the nut that has been installed onto the sensor rod by using a 13 mm spanner; now the installation of the sensor rod has been completed.
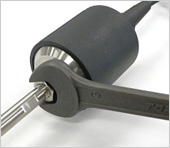
* Do not tighten the nut excessively.
* Replacement of the sensor rod should be done after having cleaned it sufficiently. If earth or sand, etc. gets into the threaded part, normal installation may be disabled.
Note that the sensor rod can be replaced with another sensor rod having a different length according to the soil ground subjected to measurement.
(At the time of delivery, the device is fitted with a sensor rod for 20 cm.)
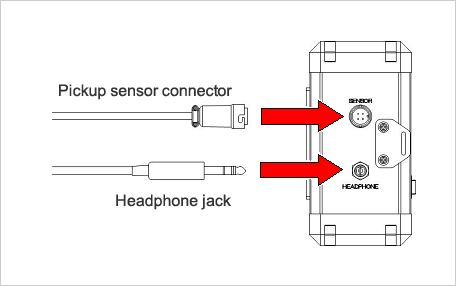
Connection of the pickup sensor and headphone
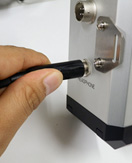
Connect the pickup sensor and headphone to the connectors at the left side of the measurement recording unit (Fig. 1).
-
(1) Connection of the pickup sensor
Correct any deformation or twisting of the pickup sensor cable.
Insert the pickup sensor connector by matching its positioning groove to that of the sensor input connector of the measurement recording unit, and lock the connector by turning the connector cover clockwise.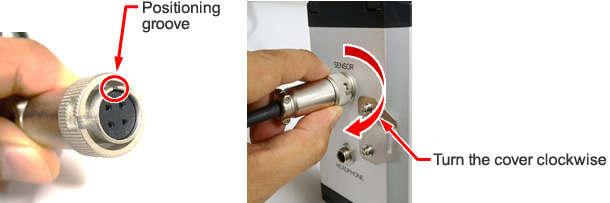
-
(2) Connection of the headphone
Insert the headphone jack to the headphone output connector of the measurement recording unit to the base.